A well-planned laundry room can make washing, drying, and folding feel far less demanding. The right layout also protects valuable floor space in compact homes. Overhead cabinets provide useful storage without blocking walkways or reducing counter space. They can hold detergents, linens, cleaning tools, and seasonal household supplies. Small details matter.
This guide explores the Top 10 Laundry Room Layout Ideas With Overhead Cabinets. It focuses on practical arrangements for different room sizes and daily routines. You will see how cabinet depth, appliance placement, lighting, ventilation, and moisture resistance affect long-term performance. Learning How to layout a laundry room with overhead storage cabinets requires more than placing cupboards above a washer and dryer. Measure twice. Leave enough clearance for doors, hoses, and maintenance access. Keep frequently used products within reach, while storing hazardous cleaners securely and away from children.
Good design should support real movement. A folding counter near the dryer can save several steps during busy laundry days. Open shelving may improve access, but it can also collect dust. Closed cabinets look cleaner, though they need proper ventilation in humid rooms. I have found that attractive layouts sometimes overlook plumbing access or machine vibration. That mistake can become expensive later. Not every idea will suit every home. Room dimensions, ceiling height, appliance style, and personal habits must guide the final decision. These examples offer reliable planning principles, but careful measurement and professional advice remain important for complex electrical, plumbing, or structural changes.
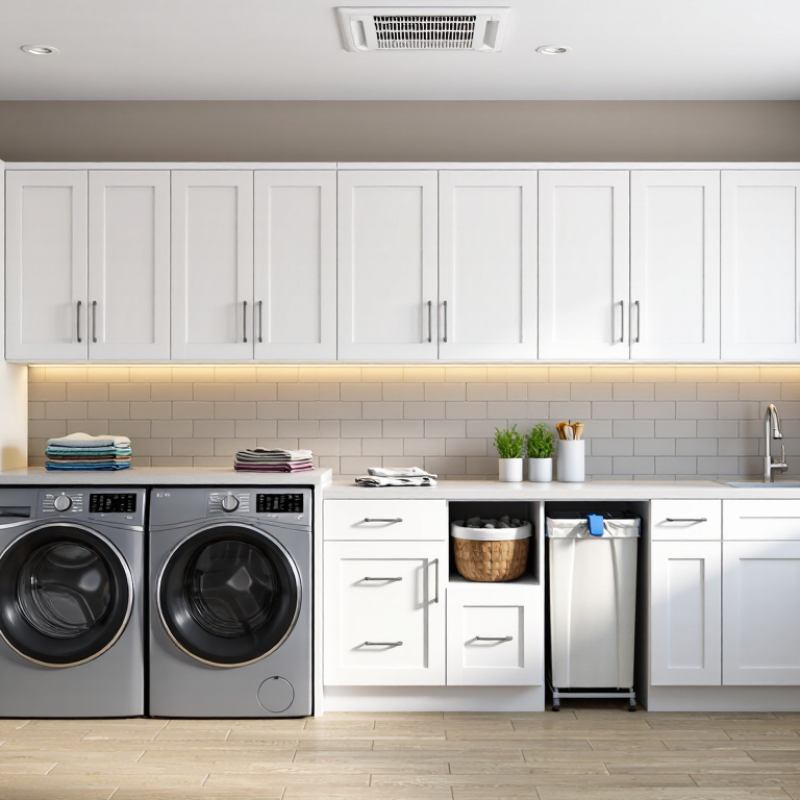
A practical laundry room begins with clear zones: sorting, washing, drying, folding, and storage. Keep the hamper near the entry, so clothing does not travel across the room. Place the washer and dryer together when possible. This reduces movement and makes shared plumbing simpler. A narrow counter above front-loading machines creates a useful folding station. Leave enough walking space around doors and drawers. Small rooms need discipline.
Overhead cabinets work best above sorting, folding, or utility zones. Avoid placing them where doors open into a walkway. Mount cabinets high enough to protect your head, but low enough for daily access. Frequently used detergent belongs on the lower shelf. Store seasonal linens higher up. Moisture-resistant materials and sealed edges help protect the cabinet interior. I once designed storage too deep, and items disappeared at the back. That mistake taught me to value reach over capacity. Open shelving may suit some homes, but it can look untidy quickly.
Tips: Measure appliance doors, cabinet depth, and walking clearance before installation. Add task lighting beneath the cabinets. Keep chemicals locked away from children and pets. Use labeled bins for small items. Check ventilation around drying equipment. If the folding surface becomes crowded, the layout needs another review. Good plans still need adjustment.
| Layout Idea | Typical Room Shape | Primary Laundry Zones | Overhead Cabinet Placement | Recommended Cabinet Depth | Useful Clearance Guidance | Best Storage Uses | Planning Advantage |
|---|---|---|---|---|---|---|---|
| 1. Single-Wall Efficiency Layout | Long, narrow room with one fully usable wall |
Wash Zone Washer and dryer placed side by side, with a folding surface at one end. |
Install a continuous cabinet run above the appliances and folding counter. Keep the area above a sink open if the sink is used frequently. | About 12–16 inches for standard upper storage. | Maintain a practical working aisle in front of the appliances; approximately 36 inches is commonly used as a comfortable target. | Detergent, stain-treatment supplies, cleaning cloths, spare linens, and seasonal household items. | Uses one wall efficiently and leaves the opposite side available for a narrow drying rail or hooks. |
| 2. Galley Laundry Room | Parallel walls with a central walkway |
Wet Zone Appliances and utility sink on one side. Dry Zone Folding counter, hanging rail, or drying rack on the other. |
Place cabinets above the appliance wall to keep the opposite wall visually lighter. Use shallow cabinets on the drying side when space is limited. | 12–16 inches above work surfaces; shallower storage can reduce the feeling of enclosure. | Preserve a clear central passage, especially when appliance doors and cabinet doors may open at the same time. | Everyday laundry products on the appliance side; folded textiles, ironing supplies, and drying accessories on the opposite side. | Separates wet and dry tasks while keeping supplies close to their work areas. |
| 3. L-Shaped Corner Layout | Two connected walls meeting at a corner |
Wash Zone Appliances along the longer wall. Fold Zone Countertop or sink along the shorter wall. |
Run cabinets above the appliances and continue them along the shorter wall where they do not obstruct a window, doorway, or plumbing access point. | Approximately 12–16 inches for upper cabinets; corner units should allow doors to open without collision. | Keep the corner usable by avoiding oversized door hardware or cabinet doors that swing into the main work area. | Corner storage for infrequently used products; daily supplies in cabinets closest to the washer and dryer. | Creates separate appliance and folding areas without requiring a large room. |
| 4. U-Shaped Workroom | Three-sided room with cabinets or counters on three walls |
Wash Zone Appliances on the back wall. Fold Zone Counter on one side. Care Zone Sink, hanging, or ironing area on the other. |
Use overhead cabinets mainly above the back wall and one side wall. Avoid filling every wall if it makes the room feel enclosed. | 12–16 inches for upper cabinets; use shallower units near narrow passages. | Aim for a central aisle that allows doors, drawers, and appliance doors to operate without blocking one another. | Bulk detergent, towels, household cleaning items, garment-care tools, and reserve paper products. | Provides the most dedicated work zones and a generous amount of storage in a larger laundry room. |
| 5. Stacked-Appliance Layout | Compact vertical alcove or closet-style room |
Vertical Wash Zone Stacked washer and dryer. Support Zone Narrow counter, hooks, or pull-out drying surface. |
Place cabinets beside the stacked units or above them only when the ceiling height, appliance clearance, and manufacturer requirements permit. | About 12–15 inches for compact overhead storage. | Leave enough space for appliance ventilation, service access, door operation, and safe movement in front of the stack. | Small containers, laundry bags, stain removers, spare filters, and folded cleaning cloths. | Maximizes vertical storage where floor area is limited. |
| 6. Side-by-Side With Full Folding Counter | Medium-width rectangular room |
Wash Zone Side-by-side appliances. Fold Zone Full-width counter directly above or beside the appliances. |
Mount cabinets above the folding counter, leaving the counter surface clear for sorting and folding. Use open shelving only for frequently used items. | 12–16 inches above the counter, depending on door swing and user reach. | Keep the counter edge and appliance controls accessible; avoid placing cabinet bottoms where they interfere with loading and unloading. | Folded clothing, towels, bedding, baskets, and daily-use detergent. | Combines efficient folding space with concealed storage in one continuous wall. |
| 7. Laundry-and-Mudroom Combination | Entry-adjacent room shared by laundry and household storage |
Laundry Zone Washer, dryer, sink, and counter. Entry Zone Bench, hooks, and shoe or coat storage. |
Place overhead cabinets above the laundry counter rather than above seating or coat hooks. Use separate storage for laundry chemicals and personal items. | 12–16 inches for upper cabinets over counters. | Keep entry paths and seating areas clear; cabinet doors should not conflict with the main door or frequently used hooks. | Laundry supplies in closed cabinets; hats, gloves, bags, and household items in separately labeled storage. | Supports multiple household tasks while keeping the laundry area organized near an entry point. |
| 8. Window-Focused Layout | Room with a prominent window on the main work wall |
Natural-Light Zone Sink, folding counter, or hanging area positioned near the window. Appliance Zone Appliances placed on an adjacent wall. |
Install cabinets on the wall beside or opposite the window. Avoid covering glazing or blocking required ventilation and natural light. | 12–16 inches on adjacent walls; use low storage beneath the window when appropriate. | Maintain access to window hardware, blinds, vents, and emergency egress requirements where applicable. | Everyday products in upper cabinets; baskets and folded textiles in lower drawers or base cabinets. | Preserves daylight and makes the room feel more open while still providing overhead storage. |
| 9. Folding-Island Layout | Large square or rectangular room with open floor space |
Perimeter Wash Zone Appliances and sink along the wall. Central Fold Zone Island used for folding, sorting, and basket storage. |
Use overhead cabinets along the appliance wall and keep the island area visually open. Avoid placing cabinets where they reduce circulation around the island. | 12–16 inches above perimeter counters. | Provide comfortable clearance around all sides of the island so people can pass while drawers, cabinet doors, and appliances are open. | Cabinets hold supplies and linens; island drawers or shelves hold baskets and sorting accessories. | Creates a dedicated folding center and keeps the main work surfaces separate from storage. |
| 10. Tall-Storage and Overhead Mix | Medium or large room with one tall uninterrupted wall |
Appliance Zone Washer and dryer on the primary work wall. Storage Zone Tall cabinet, broom storage, and overhead cabinets. |
Combine overhead cabinets above the appliances with a tall cabinet at the end of the run. Keep tall storage away from appliance ventilation openings and service panels. | 12–16 inches for upper cabinets; tall units use the full available height with accessible lower shelves. | Place frequently used items between waist and eye level; reserve the highest shelves for lightweight, occasional-use items. | Vacuum and mop storage, bulk products, ironing equipment, linens, and household maintenance supplies. | Combines vertical and overhead storage without using every wall for upper cabinets. |
Planning note: Cabinet depths, clearances, ventilation, plumbing access, electrical requirements, and appliance spacing should be confirmed against the specific appliance installation instructions and applicable local building requirements.
Frameless cabinets reduce visual bulk in tight spaces. Face-frame cabinets provide a more traditional appearance. Choose sealed edges and moisture-resistant panels. Small details matter.
Keep the lower countertop near 36 inches for comfortable folding. Leave about 18 inches between the counter and upper cabinets. Check appliance doors before fixing the final height.
Install overhead storage only when both appliance doors remain fully accessible. Leave clearance for loading, repairs, hoses, and ventilation. A small landing area beside the machines helps hold baskets.
Adjustable shelves handle bottles and towels more effectively than fixed layouts. Pull-down racks and divided bins improve access. Add one open cubby for frequently used items. Open shelves collect lint quickly.
Use shallow cabinets for detergent and cleaning supplies. Choose deeper storage for folded linens and towels. Measure the largest container first. Measure first.
Measure machine depth, door swing, hoses, and service clearance before selecting cabinets. Stand at the appliances with a full basket. If your shoulders twist, revise the layout.
Combine general ceiling lighting with under-cabinet fixtures. Light the counter, sink, and appliance doors without creating shadows. Moisture-resistant fittings suit sinks and drying areas. One ceiling light may not be enough.
Keep cabinet doors away from walking paths and appliance controls. Secure cabinets to wall framing, especially near vibrating machines. Leave access around plumbing, shutoff valves, and lint-cleaning points. Safety deserves more attention than appearance.
Designing a functional laundry room starts with understanding its main zones: washing, drying, folding, hanging, and storage. The article explores How to layout a laundry room with overhead storage cabinets by adapting the arrangement to different room sizes and traffic patterns. It explains how to position cabinets above appliances or work surfaces while preserving comfortable access, clear walkways, and enough space for doors and drawers to open fully.
The guide also covers cabinet heights, door styles, adjustable shelving, and practical storage features for cleaning supplies, linens, and household essentials. It shows how to combine washers, dryers, countertops, drying rods, and overhead storage into an efficient workflow. Finally, it highlights the importance of safe installation, task lighting, airflow, moisture control, and easy-to-clean materials, helping create a laundry room that is organized, comfortable, and convenient for everyday use.

 Jaydee furniture